While I am working on something special for a wonderful yoga teacher, who is also a composer, as well as a wedding gift for my niece—so sorry it’s taking so long Sweetie, I sewed a zippered pouch to attach to my store bought yoga bag, to hold more things, because apparently, I like to torture myself and carry more weight than is necessary. I’m always try to add homemade sewing accessories to my purchased items. Why?—I don’t know why.
First, I made another pair of the small yoga pad covers to put under my sensitive heels when they have to touch the hardwood floor. I used one of my favorite, well-made heavy cotton material. It isn’t flimsy at all, but it also isn’t home dec fabric either. I purchased a lot of yards of this a few years ago at JoAnns. I really wish I hadn’t sold—at a great discount—a couple of yards of this fabric, to a woman who worked at JoAnn’s, as it is one of my favorites, and can’t be found any where anymore.

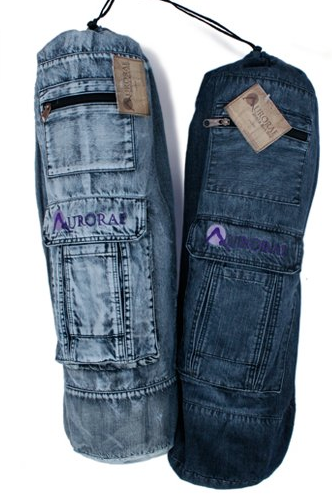
But, the main accessory I sewed, is the zippered pouch I attached onto the flap of one of these roomy yoga mat carriers, to cover up the purple logo—and yes, I bought both of them because I couldn’t decide which one I wanted. It is the Aurorae Yoga Mat Bag “The Mat Sak” 100% Cotton Premium Ring Spun Denim. I bought them on Amazon back in May.
Anyway, here is the zippered pouch I made. Behind the bag is a water bottle carrier that I also made. I can attach it to the carrier sling.

Inside, the zippered pouch holds my small yoga pads I made, but I can put other things in it as well.


Every time I turned over the bag to empty out the mat, everything came out of the large cargo pocket, like my sunglasses and iPhone. The velcro apparently isn’t sturdy enough, so I added a strong snap that covers both the large cargo pocket as well to the cell phone pocket on the yoga carrier. My cell phone doesn’t fit inside the little pocket because my iPhone cover is too big. But I’m sure I can find something else to put in there. Plus, it will stay closed at the same time the large cargo pouch is closed, since the large cargo pouch flap snaps onto the little pocket.

Note that when the pouch is lifted, the top flap of the yoga bag is also lifted. That’s because I also sewed a stay stitch along the top and the sides above the zipper, as well as inside the back of the pouch through the opening of the zipper so that when the pouch is lifted, the logo still can’t be seen.